Creating the pipeline
The best way to automate the creation of CI/CD pipelines is by launching them programmatically. This is specially useful in a microservices environment, where you create a pipeline per microservice, which potentially means dozens of pipelines, if not more. Having an automated way to launch pipelines enables developers to create as many as they need without having to build them manually from the console every single time.
CloudFormation is just one of the many ways you can go about automating Pipeline creation. But there are a few other mechanisms we see customers use as pipeline vending machines. The following list describes some of the most common ones:
For this workshop, we are going to use CloudFormation as the vending mechanism. And we have already built a template that will help you get started. From your terminal, download the CloudFormation template:
wget https://cicd.serverlessworkshops.io/assets/pipeline.yaml
Understanding the template (Optional)
Let’s take a moment to understand the key components of the CloudFormation template.
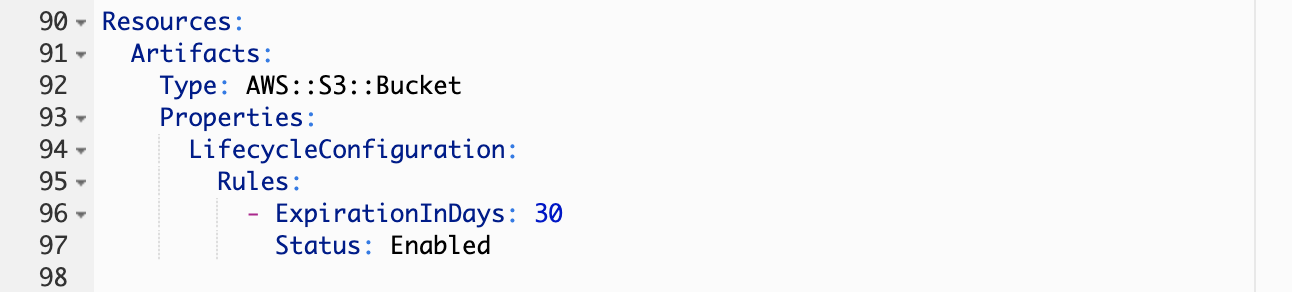
The Artifacts Bucket
This is the artifact store for your pipeline. CodePipeline will use this bucket to pass artifacts to the downstream jobs. This is also where SAM will upload the artifacts during the build process.
The Source Stage
The source stage is the first step of any pipeline and it points to your source code. It determines when to trigger the pipeline based on new changes (i.e. git push). This pipeline uses AWS CodeCommit as the source provider, but CodePipeline also supports S3, GitHub and Amazon ECR as source providers.

The Build Stage
The build phase uses AWS CodeBuild as the build provider. But CodePipeline supports other providers like Jenkins, TeamCity or CloudBees. CodeBuild is a great option because you only pay for the time when your build is running, which makes it very cost effective.
A CodeBuild project has information about the build environment. A build environment represents a combination of operating system (Linux or Windows), compute size (Small, Medium, Large) and a Docker image where the build runs. You can bring your own Docker image or use the managed images provided by the service. In this case, we are using the managed image for Amazon Linux 2: aws/codebuild/amazonlinux2-x86_64-standard:1.0.

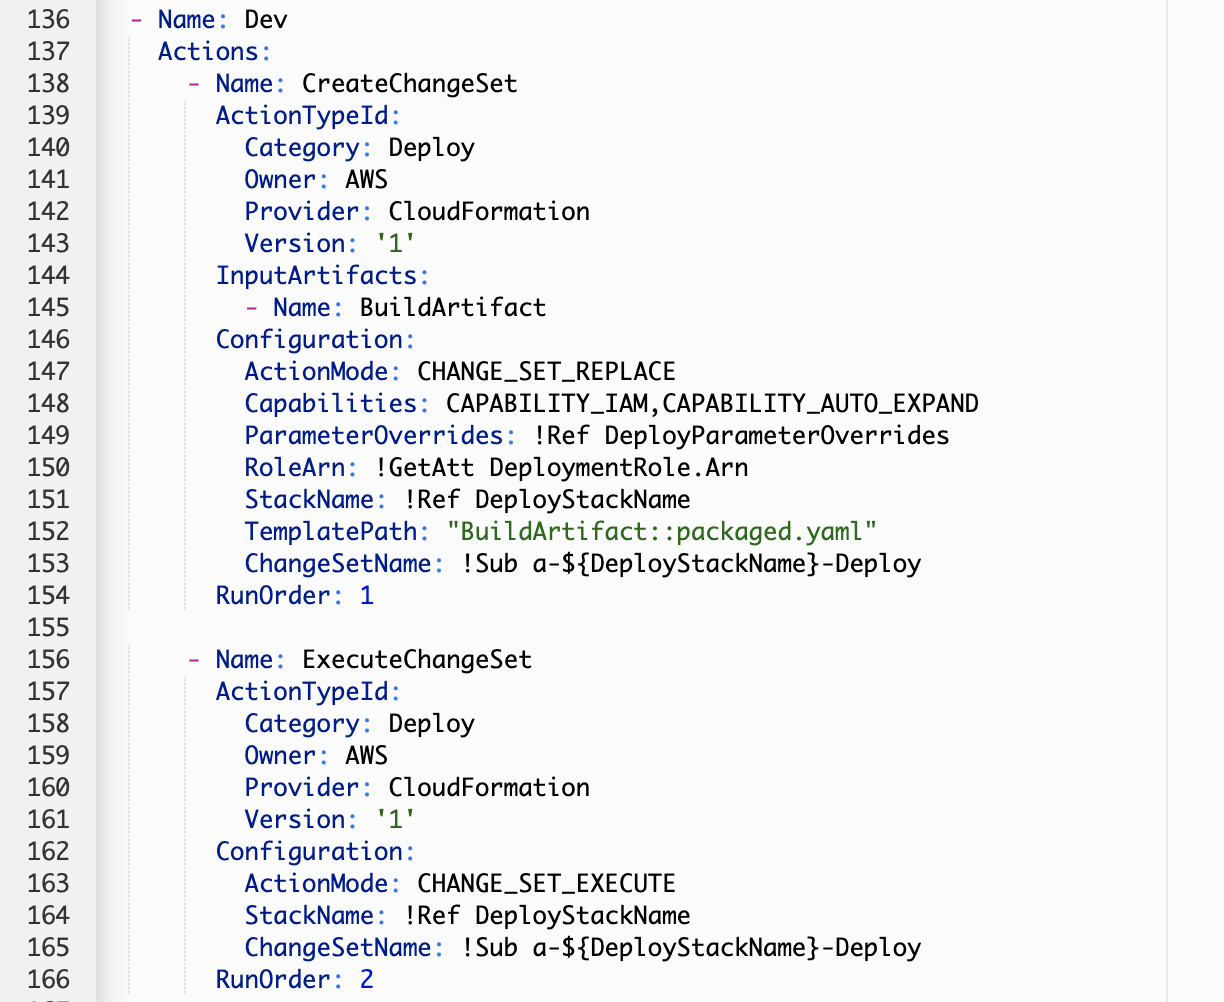
The Deployment Stage
This pipeline uses CloudFormation ChangeSets to deploy the SAM application. This is why the deployment stage is composed of 2 steps, the CreateChangeSet and the ExecuteChangeSet. The main thing to highlight here is the TemplatePath, notice how our deployment artifact is the packaged.yaml produced by the SAM build.
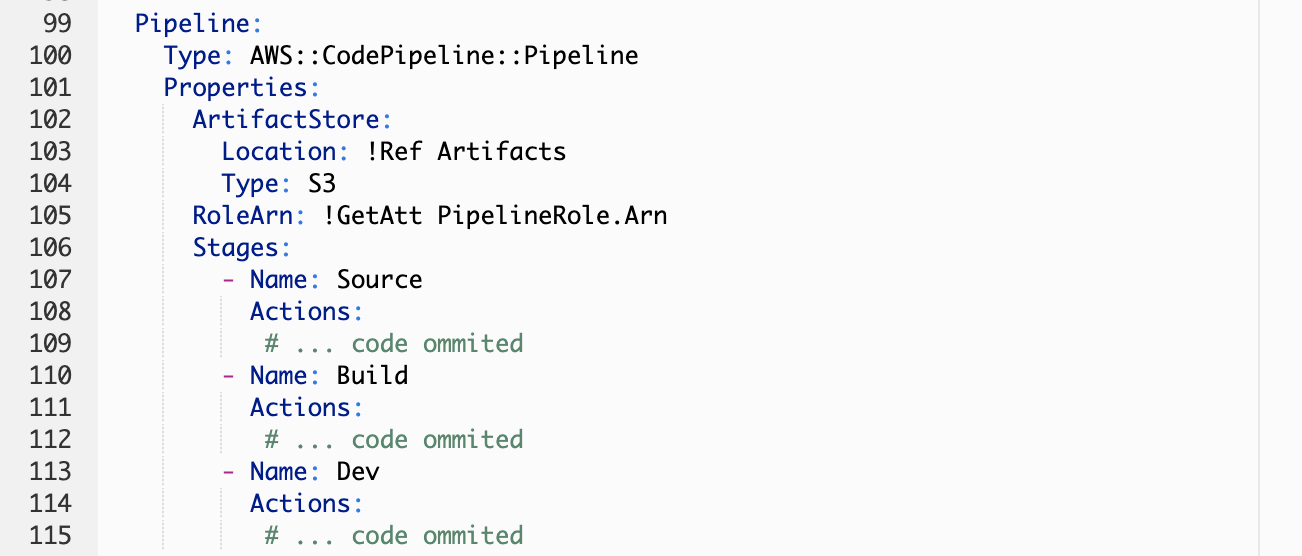
The Pipeline Definition
The pipeline definition is very straightforward. You specify the bucket for artifacts and a list of Stages, which in this case we have 3: 1. Source -> 2. Build -> 3. Deploy to Dev. The configuration for each stage is ommited in the following image because it has already been shown in the screenshots above.
The IAM Roles
In case you haven’t noticed. This pipeline involves 3 different IAM Roles. It’s important to be aware of them in case you need to troubleshoot a permissions error, depending on what stage of the pipeline you got it, you know what role to modify.
- CodeBuild Role: Assumed by CodeBuild to write SAM artifacts to S3.
- Deployment Role: Assumed by CloudFormation to create resources at the deploy stage.
- Pipeline Role: Assumed by CodePipeline to invoke the different stages on your behalf.
If you are curious, you can explore the IAM policies for each of these roles in the CloudFormation template.